
A publishing setup that works on one engineer’s computer is only useful when every seat in the department produces the same PDF, STEP and DXF output, named the same way, in the same folders. PDMPublisher for SOLIDWORKS solves that at three levels: Publish profiles package Options, Annotations and Conditions into a named configuration; PIN sharing and settings bundles move a profile or the entire configuration to another computer; and Company Settings let an administrator publish selected settings once so every licensed user in the company downloads and, optionally, is required to use them.
What a Publish profile is
A Publish profile is a reusable combination of Publish settings (Options), Annotations and Conditions. It carries the Export Location, Filename, File Formats, reference behavior, drawing sheet handling, PDF merge settings and everything else on the Publish page, together with the stamps you place on output and the rules that decide which references are processed. Select a profile before publishing and the job uses that configuration.
Profiles are a feature of the SOLIDWORKS add-in. Save As New, Property Doctor and Clone Tree have their own separate profile families, documented with those commands, and the PDM task does not use add-in profiles at all.
Name profiles after their output. Released PDF, Laser DXF and PDF And Step are the kind of names that still make sense when they appear in the CommandManager menu six months later.

Why it matters
- Release packages that look the same from everyone. Suppliers and quality departments notice when one engineer’s PDFs carry the revision stamp and another’s do not. A shared profile removes the variable.
- One click per deliverable. A drawing that must go out as a merged PDF for the customer, a STEP for the supplier and a flat-pattern DXF for the laser shop is three profiles, each selected from the arrow menu, instead of three rounds of settings changes.
- Onboarding in minutes. A new seat imports a settings bundle or downloads company settings and publishes correctly on day one.
- Controlled change. When the export folder moves or the title-block annotation changes, the administrator publishes new company settings once; with the Required policy nobody can drift away from them.
How profiles work day to day
- Open PDMPublisher > Settings > Publish. The profile selector at the top of the page shows the active profile; the page and pencil buttons beside it create and rename profiles.
- Configure Export Location, Filename, File Formats and reference behavior on the Publish page, then edit Annotations and Conditions from their CommandManager buttons. All three sections are stored in the active profile.
- Select OK to save the settings.
- To publish, select the arrow beside Publish and choose Profile: name, or choose Profile: Default to use the current default settings.
- If Show dialog before processing is enabled, review the resolved output and processing options before confirming the job.
While a profile name is being edited, the other profile commands are unavailable until the name is saved.
Profile commands
Every profile operation is available from the Publish settings page. The table lists each control with its behavior.
| Command | What it does | Notes |
|---|---|---|
| Profile selector | Chooses the active Publish profile. | Also exposed by the arrow beside Publish in the CommandManager and, for a component selected in an assembly, by the right-click menu. |
| New > New… | Creates a blank profile to configure from the beginning. | Set Export Location, Filename, File Formats, reference behavior, Annotations and Conditions before publishing. |
| New > New From | Creates an editable profile from a supplied built-in starting profile. | Choices: DXF, PDF And Step, STEP. A built-in profile never publishes by itself. |
| Edit (pencil) | Renames the selected profile. | Change the name in the profile field and select Save, then OK. |
| Export > Export to File… | Writes the complete profile to a .pdmpublisherprofile file. | Preserves Options, Annotations and Conditions. Keep a copy before changing computers or reworking an established setup. |
| Export > Share using PIN… | Uploads selected sections and returns a six-digit PIN. | PIN valid for 30 days; both users need an internet connection. |
| Load From… > Load from File… | Imports a .pdmpublisherprofile file. | Saved locally, applied immediately, becomes the active profile. |
| Load From… > Load using PIN… | Downloads a shared profile by PIN. | Choose which sections to apply with Load Selected. |
| Delete | Removes the saved configuration. | Does not delete exported documents. Export first if the profile may be needed later. |
Built-in starting profiles
PDMPublisher for SOLIDWORKS ships three starting profiles. New > New From copies one into a new editable profile; changing the copy never changes the supplied configuration, so you can create several profiles from the same starting point for different customers, projects or output packages.
| Built-in profile | Starting purpose | What to review before publishing |
|---|---|---|
DXF | Drawing or manufacturing DXF output. | Export location, filename, sheet or flat-pattern options, Conditions. |
PDF And Step | PDF documentation and STEP model output. | Export location, filename, PDF merge and annotation settings, reference processing. |
STEP | STEP model output. | Export location, filename, configurations and reference processing. |
A built-in profile does not publish by itself. The profile created by New From is what runs when you select PUBLISH.
Share a profile using a PIN
PIN sharing is the fastest way to hand a profile to a colleague. Before uploading, PDMPublisher lets you choose which sections to include: Options, Annotations and Conditions. All available sections are selected by default and at least one must remain selected. The recipient can in turn apply only the sections they need; settings in sections that are not applied remain unchanged in their current profile.
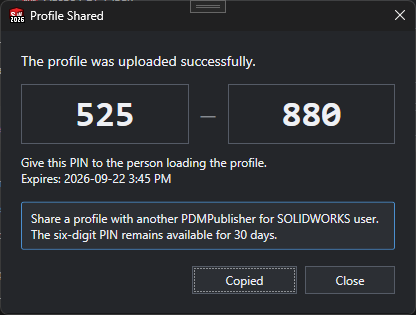
To share: select the profile, open Export, select Share using PIN…, tick the sections, select Share and wait for the upload. In the Profile Shared dialog select Copy PIN and send the PIN to the recipient. The dialog shows the expiration in the sender’s local time.
Load a shared profile
PDMPublisher downloads the profile, saves it locally, applies the selected sections and makes it the active profile. If a local profile already has the same name, you are asked whether to replace it, import it under another name, or cancel. An expired or invalid PIN cannot be loaded; ask the sender to share again for a new PIN.
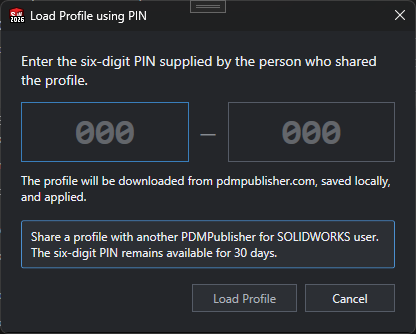
- Open Load From…, then select Load using PIN….
- Enter the six-digit PIN supplied by the sender.
- Select Load Profile.
- Select which available sections to apply, then select Load Selected.
Anyone who has an active PIN can download the shared profile. Profiles can contain export paths, filenames, annotations, conditions, PDM property names and SQL annotation settings. Never share passwords, private connection strings or other secrets through a PIN; use it for convenient, short-lived configuration exchange.
Move the complete configuration with a settings bundle
A single profile is not always enough. Filenames and folders often reference named Advanced Formulas and External Sources, drawing lookups depend on File Locations, and Save As New, Property Doctor and Clone Tree each have their own profiles. The Import and Export menus at the bottom of PDMPublisher > Settings transfer all of it at once.
A complete bundle contains utility settings, Save As New profiles, Property Doctor profiles, Clone Tree profiles, shared formulas and sources, file locations, annotations, conditions and complete Publish profiles. ERP Sync settings are included, but connector credentials and other saved connector values remain protected for the current Windows user and are not made portable. Publisher Macros code is stored locally and is not included. SQL Server connection secrets are never exported or uploaded; after an import, re-enter credentials for external sources that do not already have matching local credentials.
| Command | Scope | Notes |
|---|---|---|
| Reset | Restores defaults for the currently selected settings page. | Saved only after selecting OK. |
| Export all settings to File… | Writes a complete configuration bundle for backup or offline transfer. | Keep one as a recovery copy before major changes. |
| Share complete settings using PIN… | Uploads a complete bundle and returns a six-digit PIN. | Same expiry and security caveats as profile PINs. |
| Import all settings from File… | Validates and applies a bundle from disk. | A timestamped local backup is created before settings are replaced. |
| Import complete settings using PIN… | Downloads, validates and applies a PIN-shared bundle. | If applying a section fails, PDMPublisher attempts to restore the previous configuration. |
Recommended transfer workflow
- On the source computer, export all settings to a file and keep it as a recovery copy.
- Export to a file or create a PIN for the intended recipient.
- On the destination computer, import the file or enter the PIN.
- Review vault selection, external-source credentials, local file locations and output paths, because local paths and vault names may not exist on another computer.
- Open each important profile and run a controlled test document.
Shared Resources: what profiles reuse
Profiles reference definitions that live in the Shared Resources group of Settings. A shared resource supplies a reusable definition; individual profiles and commands still decide whether to use it. Changes on these pages are not committed until you select OK, and Cancel discards edits made since the Settings window opened.
| Page | Used for | Controls |
|---|---|---|
| PDM | Selects the local SOLIDWORKS PDM Professional vault used by serial numbers, automatic check-in, Vault root folder placeholders and other PDM-aware tools. | Use vault and the vault selector. See SOLIDWORKS PDM integration. |
| Languages | Selects the add-in interface language and regional formatting. | Reopen existing PDMPublisher windows after changing it. |
| File Locations | Additional folders searched for drawings associated with parts and assemblies. | Add, Remove, Include subfolders, Include SOLIDWORKS File Locations > Referenced Documents folders. |
| External Sources | Reusable SQL Server connections and queries used by property and formula menus. | Add, Edit / Test, Delete. Credentials stay local. |
| Advanced Formulas | Named expressions shared by filename, folder and property menus. | Add, Edit, Delete. |
File Locations deserve a note because they affect which drawing a profile publishes. PDMPublisher searches the active model’s folder first, then the configured folders in list order, and includes a drawing only when its filename matches the part or assembly filename. Keep the list narrow, put the most likely locations first, and enable Include subfolders only where the folder structure is controlled. These locations do not change SOLIDWORKS reference paths and are not export destinations.
Company Settings: one configuration for every licensed seat
Company Settings lets an administrator publish selected PDMPublisher for SOLIDWORKS settings once and make them available to every licensed user whose activated license has the same company name. Users do not need a website account or the administrator password to download the settings. The feature requires an activated license that includes your company name.
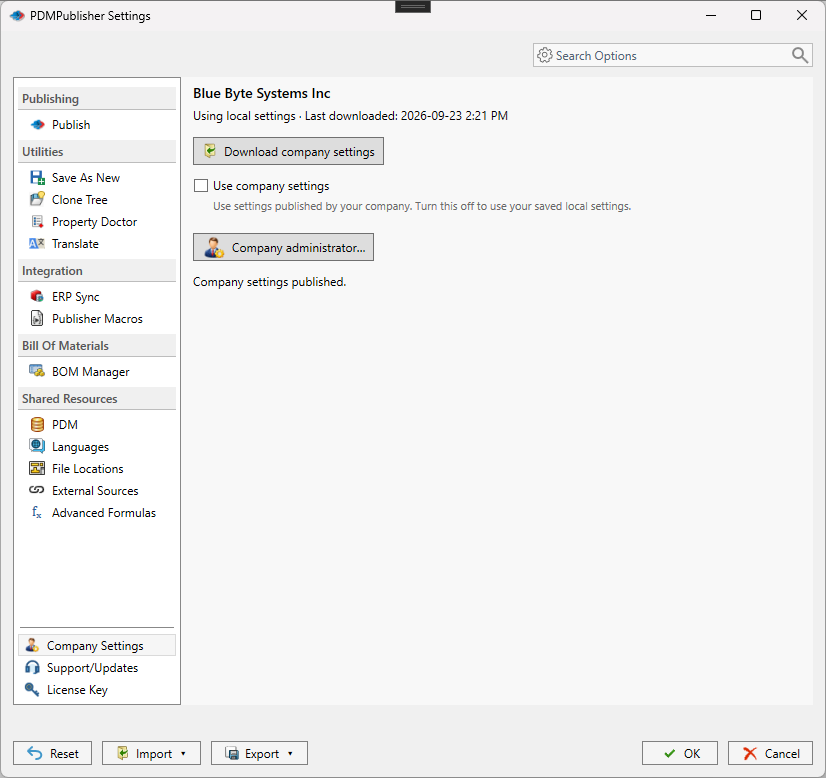
Open PDMPublisher > Settings > Company Settings. The page shows whether this computer is using local or company settings and when it last downloaded the company configuration.
| Control | What it does | Notes |
|---|---|---|
| Download company settings | Fetches the latest settings published by the company administrator. | Save your current work first. |
| Use company settings | Applies the managed values; clear it to return to locally saved values. | Available when the administrator chose Let users choose. Locked when the policy is Required. |
| Status line | Shows local versus company mode and the time of the last download. | Managed pages show a padlock and are read-only under Required. |
| Company administrator | Reveals the administrator password field. | Enter the company administrator password and select Unlock. |
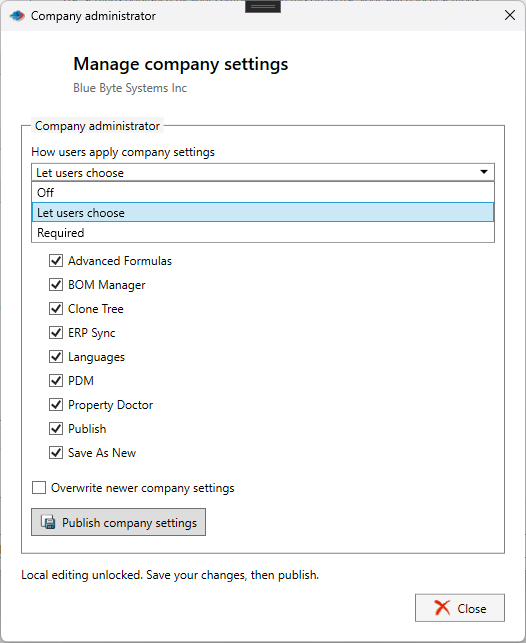
| Policy: Off | Every user keeps local settings. | Administrator only. |
| Policy: Let users choose | Users can enable or disable Use company settings. | Administrator only. |
| Policy: Required | The selected settings are enforced and their pages become read-only. | Administrator only. |
| Setting groups | Chooses which groups are published. | Advanced Formulas, BOM Manager, Clone Tree, ERP Sync, Languages, PDM, Property Doctor, Publish, Save As New. Unselected groups keep each user’s local settings. |
| Publish company settings | Uploads the selected groups from this computer’s saved settings. | Save edits in the normal Settings dialog first. |
| Overwrite newer company settings | Replaces a newer published configuration with this computer’s settings. | Use only intentionally; review the confirmation carefully. |
Set it up in the SOLIDWORKS add-in: publish as the administrator
- Open PDMPublisher > Settings and configure everything you want to standardize: Publish profiles, Annotations, Conditions, Advanced Formulas, PDM vault, Save As New and Property Doctor profiles, BOM Manager and ERP Sync defaults. Select OK to save.
- Open Settings > Company Settings, select Company administrator, enter your company administrator password and select Unlock.
- Choose how the published settings apply: Off, Let users choose or Required.
- Select the setting groups to publish. Only the selected groups are shared.
- Select Publish company settings.
- To change the configuration later, unlock again, make and save your changes in Settings, return to Company Settings and publish again. If you close the editing session without publishing, the changes remain only on your computer.
- If PDMPublisher reports that newer company settings are available, download them before publishing again, or use Overwrite newer company settings only when you intend to replace them.
Set it up in the SOLIDWORKS add-in: use company settings as a user
- Activate a PDMPublisher license that includes your company name (PDMPublisher > License Key).
- Open PDMPublisher > Settings > Company Settings.
- Save any current work, then select Download company settings.
- If the policy is Let users choose, tick Use company settings. If it is Required, the checkbox is already locked on and the managed pages show a padlock.
- Select OK. Publish with the company profiles from the arrow menu beside Publish.
Recipes
- Three deliverables, three profiles. Use New From to create
Customer PDFfromPDF And Step(remove STEP, set the merged PDF options and a revision annotation),Supplier STEPfromSTEP, andLaser DXFfromDXFwith a Condition that only processes sheet-metal parts. Engineers pick the deliverable from the Publish arrow menu. - Hand a profile to a contractor for a week. Select the profile, Export > Share using PIN…, include only Options and Annotations (keep your Conditions private), copy the PIN. The contractor uses Load From… > Load using PIN…. The PIN expires after 30 days.
- Standardize a ten-seat department. Build the full configuration on one computer, export a settings bundle as a recovery copy, then unlock Company Settings, set Required, tick Publish, Advanced Formulas, PDM and Save As New, and publish. Leave Languages unselected so each user keeps their own interface language.
Tips, limits and troubleshooting
- Profiles and settings transfer are available in the Community Edition as well as Premium. Premium removes format, reference and row limits but is not required for sharing.
- A loaded profile with a name conflict offers replace, import under another name, or cancel. Choose a new name when you want to compare the old and new configuration side by side.
- Loading a profile file does not change any built-in profile used as its starting point.
- Imported paths may not exist. After an import or company download, check the Export Location, File Locations and PDM vault selection on the receiving computer.
- SQL secrets never travel. External-source credentials are excluded from profiles, bundles and company settings. Re-enter them locally.
- Company Settings requires a license with a company name. Community Edition users and licenses without a company name cannot download company settings.
- Under the Required policy, managed pages are read-only. If a user cannot edit a page, the padlock icon indicates the administrator enforces that group.
- Publish only from saved settings. Company Settings publishes what is saved in the normal Settings dialog. Select OK before publishing, otherwise the unsaved edits are not included.
- Newer company settings available. Download before publishing again; overwriting is deliberate and confirmed.
- Use PDMPublisher > Logs to confirm which profile a job ran with; the Results tab shows each output and its destination, and Save… stores the log for support.
Availability
Available in PDMPublisher for SOLIDWORKS, the add-in that runs inside SOLIDWORKS. Not part of the PDM Professional task. Publish profiles, PIN sharing, settings bundles and Company Settings belong to the PDMPublisher for SOLIDWORKS add-in. The PDM Professional task stores its configuration in a task definition inside the vault, so every user of that vault already runs the same settings and no profile sharing is needed there.
Documentation and related features
- Publish Profiles documentation
- External Sources and Advanced Formulas
- SOLIDWORKS PDM integration
- Watermark your PDFs
- Conditional assembly processing
- Save As New
- Publisher Macros
Frequently asked questions
What does a PDMPublisher Publish profile contain?
Options (export location, filename, file formats, reference behavior and the other Publish settings), Annotations and Conditions. Selecting the profile before publishing runs the job with that whole configuration.
How do I share a PDMPublisher profile with a colleague?
Select the profile, open Export > Share using PIN…, choose the Options, Annotations and Conditions sections to include, select Share and copy the six-digit PIN. The colleague uses Load From… > Load using PIN… and picks the sections to apply. The PIN is valid for 30 days and both users need an internet connection.
Can I export a profile to a file instead of a PIN?
Yes. Export > Export to File… writes a .pdmpublisherprofile file that preserves the full profile. Load it on another computer with Load From… > Load from File…
What is the difference between a profile export and a complete settings bundle?
A profile export moves one Publish profile. A settings bundle (Settings > Export all settings to File… or Share complete settings using PIN…) moves every profile family, shared formulas and sources, file locations, annotations and conditions. SQL Server secrets and connector credentials are excluded from both.
What are Company Settings in PDMPublisher for SOLIDWORKS?
An administrator publishes selected setting groups once, and every user whose activated license carries the same company name can download them from Settings > Company Settings. The policy can be Off, Let users choose or Required; under Required the managed pages become read-only.
Do the built-in DXF, PDF And Step and STEP profiles publish on their own?
No. Use New > New From to create an editable profile from one of them, adjust it, and select PUBLISH with the new profile. Editing the copy never changes the supplied starting configuration.